Sunday, November 27, 2011

Memo Board Makeover

Oh, how I wish I had a 'before' photo of this project!  I've always had a memo board hanging on the side of our refrigerator.  The original one was basically a piece of corkboard covered in red and gold fabric with ribbon criss-crossing it.  Oh, how 2002!  It was so covered in photos, that I guess I never noticed how much the fabric didn't even match my kitchen - I mean, gold???  So, when it actually fell off the fridge last week, I decided it was time for a makeover.
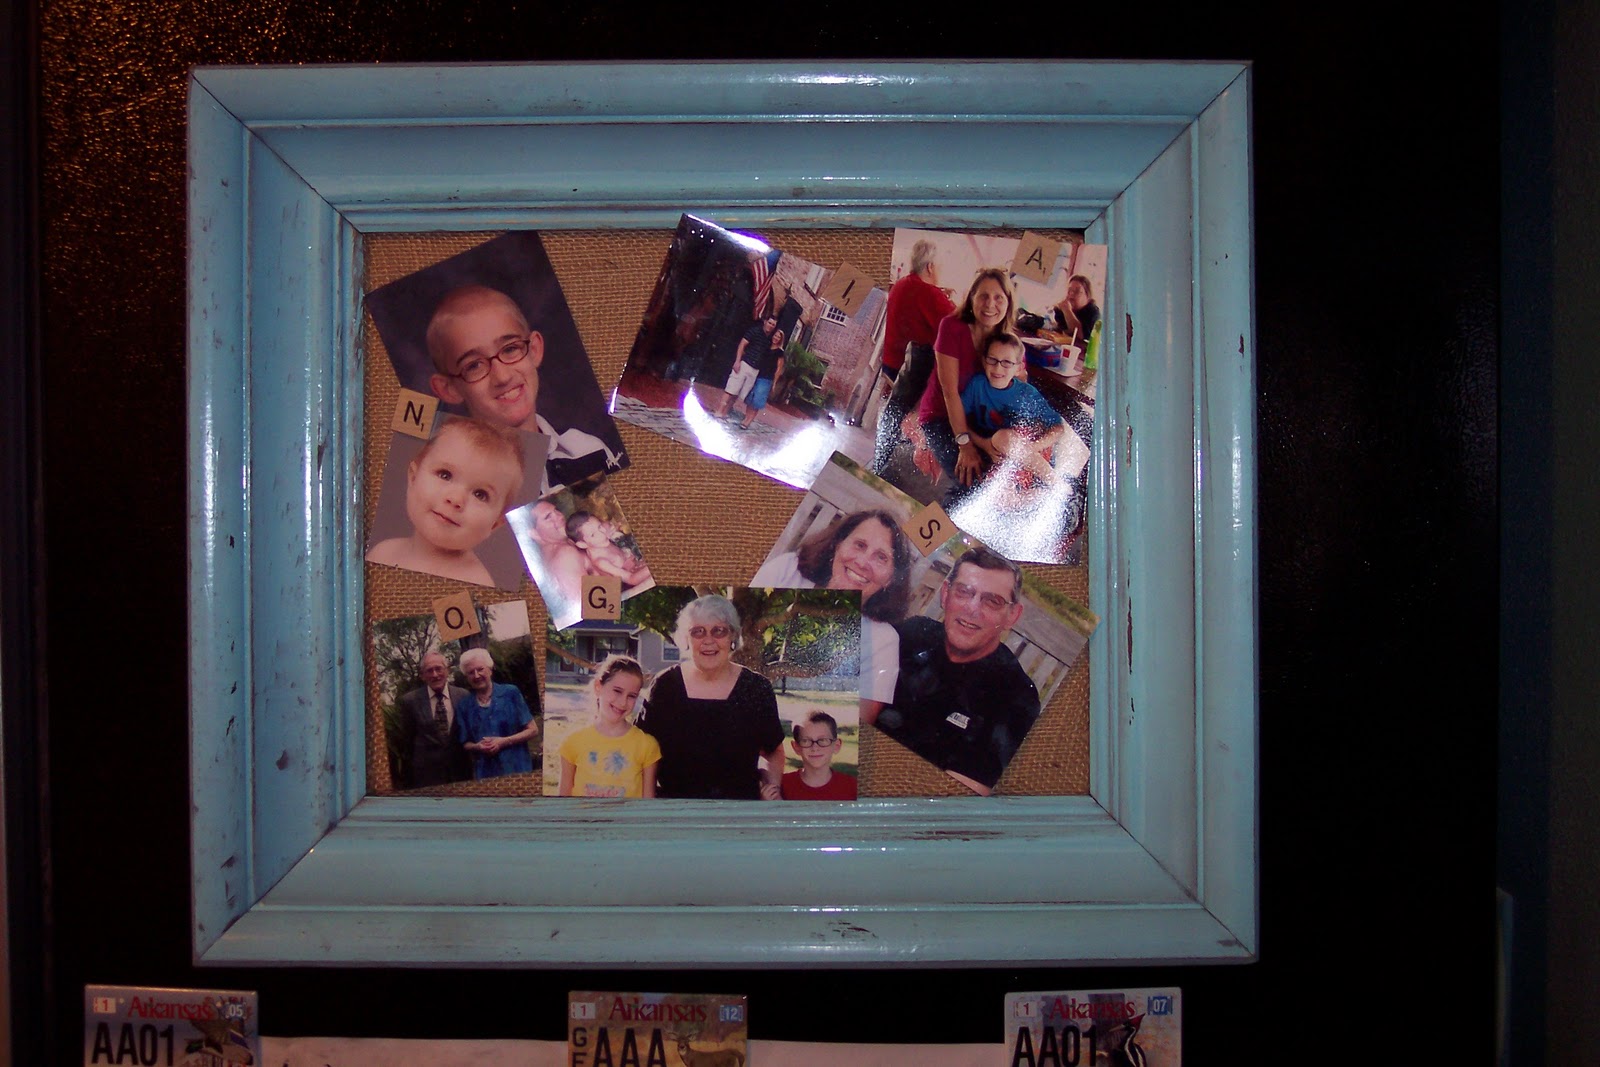
All the photos came off - most I tossed.  Unsentimental, I know - but we'll be getting lots of new ones soon as friends and family send out new Christmas photos!  I couldn't rip the fabric off any faster, and then I had my clean slate.  A too-plain clean slate, I decided, so I realized it needed a frame.  Fortunately, frames are always easy to come by at my house.  I dug this one out, spraypainted it aqua (what have I said about the convenience of keeping cans of spray paint around the house??!!), cut the corkboard to fit it - and I started to get excited!  Then I found some burlap fabric, covered the corkboard, stuck it inside the frame and I was ready to go.  I used some Scrabble tile tacks that I made last year (simply glued the tiles to tacks) to hang some favorite family photos back up and it was complete!  I've resolved to keep less photos on it, so the cute burlap can show through. 
You might be thinking - how did she attach that to her refrigerator?  I hot-glued it.  Yep - hot glue solves all kinds of problems.  It hasn't fallen down yet!  And I figure when it does, it'll be ready for another makeover!

Tuesday, November 22, 2011

Countertop Transformation!

My kitchen has always been one of my least favorite rooms of the house.  The cabinets were covered in a black glaze, the walls were boring tan, the laminate countertops and backsplash were dark green and the floors were fake tile linoleum.  So...I just completed another step in a 2 year kitchen renovation process!  It has taken so long because I broke it down into smaller projects that I could do by myself.  First I painted the walls teal. Next, I painted the backsplash white.  I slowly introduced different red and white transferware dishes and a couple aqua touches.  This past summer I painted the cabinets.  Finally, over these past few days, I got rid of the ugliest part - hunter green mottled laminate countertops.  There was nothing wrong with them except for the color.  Since they were structurally sound, my husband and I were both loathe to pay thousands of dollars to have them replaced.  A friend of mine came across a quicker, easier and cheaper option - Countertop Transormations by Rust-Oleum.  This is an entire kit which essentially involves painting the countertops, spreading different colored chips down, then painting a protective coat over it.  It looks like granite - but at a fraction of the cost!  Since I just finished the clear coat this morning, time will tell how the surface wears.  So far, it looks fantastic!  Throughout this whole process, we haven't been able to use our kitchen for the past several days.  So eating off paper plates and rinsing dishes in the bathroom has just led to us eating out the past couple days - a nice fringe benefit!  The final coat needs 7 days to set - so leaving town tomorrow for the rest of the week is great timing!  The bottom photo here is after my cabinet painting, but while the counters were still green.  I foresee getting rid of the fake tile linoleum floor next...I'll have to see if Rust-oleum makes a Floor Transformation Kit!!!


Monday, November 14, 2011

Windowsills

It's always been a conundrum whether to decorate by placing objects in a windowsill.  It's something I've tried over the years, have seen and read about, and have finally come up with this conclusion:  If it's a window that is opened and closed quite a bit - don't do it.  If you have to dust around the objects - definitely don't do it.  My windows are open quite a bit throughout the entire year, and I hate to dust, so these rules are good deterrents for me.  The absolute only instance in which I would decorate a windowsill is if the objects look fantastic in sunlight.  After many years of not ever putting anything in windowsills in my home, I have finally made an exception for these beautiful blue Mason jars.  I have many of these, and have found they look beautiful grouped together on a windowsill with the sun shining through them.  They even make great vases while sitting there!  This is the only window in my home that is decorated, and it's on a back wall of my kitchen and not opened often. Perfect!
Just to put the whole windowsill issue in perspective - it's like putting something on top of your toilet tank.  Yes, it's blank space.  Yes it might look like something needs to fill that space.  That doesn't mean you need to decorate it!  When I come up with an exception to this rule - I'll let you know!

Tuesday, November 8, 2011

Scale and placement

When I first saw this mirror I thought 'French brothel.'  Come on, admit it, so did you!  But I absolutely love it and thought it would make a great addition to my mirror collection.  Boy was I wrong!  This 4 foot tall extremely chunky mirror completely overshadowed not only my entire mirror collection, but also any piece of furniture I tried to put it over in my dining room.  I was almost resigned to putting it on the ceiling in my bedroom (just kidding!) when I tried it in my living room.  I'm working on a complete living room redo, and had just emptied out one corner of the room.  Which means there was no furniture in that corner at all.  My living room definitely needs a statement, and this mirror was perfect!  I put it above a curvy, low, wide desk and it doesn't overpower.  This mirror definitely just needed it's own space and wanted to be the center of attention!
The moral of the story is - you can't just put things in your house without paying attention to their size and presence.  If it looks a little odd to you, it's guaranteed to look odd to everyone else!  Pull furniture and accessories together into vignettes, always making sure their size and style go well together.  Notice how I've paired a simple narrow chair and lamp to go with the chunky frame and wide desk.  They help to even eachother out, so nothing can become too overpowering.

Tuesday, November 1, 2011

Keep those pumpkins out!


Pumpkins and gourds are a great natural way to decorated for fall.  I've completely gotten rid of most of my fall decorations except for these simple gourds.  I know, I know, I've waited until after Halloween is over to post about pumpkins.  But, just because it's over doesn't mean you have to get rid of those pumpkins (unless you've carved them of course!).  Keep the pumpkins out as a great reminder of fall/harvest/Thanksgiving!  In fact, fall decorations should be on sale right about now - and it's always a great idea to buy fake pumpkins/gourds so they last from year to year.  But make sure they are realistic looking - no glitter please!  Fake ones can be pricey, but will save you money over the years.  I love the look of these white/gray pumpkins.  See if you can tell which ones are fake and which ones are real!